A Seagate backup drive is an external hard drive that is often used to create backups of files on a computer. The drive connects to a computer via USB and allows users to copy important files to the drive as a way to safely store and preserve them.
There are a few common situations when someone may need to transfer files from a Seagate backup drive to a new computer:
- Getting a new computer: When upgrading to a new computer, users will need to move their files from the backup drive to the new computer.
- Recovering lost files: If files are accidentally deleted or become corrupted on a computer, the backup files on the Seagate drive can be transferred back to restore the lost files.
- Hard drive failure: If a computer’s main hard drive fails, the backup files on the Seagate drive can be transferred to a replacement drive or new computer.
- Extra storage space: The files on a Seagate backup drive can be transferred to a new computer to have that additional storage space available.
By connecting the Seagate backup drive to the new computer and transferring the files, users have access to those backed-up files once again.
Back Up New Computer Before Transferring Files
It is highly recommended to back up your new computer before transferring any files from your Seagate backup drive. Backing up the new computer provides an extra layer of protection in case anything goes wrong during the file transfer process. It also ensures you have a clean restore point to go back to if needed.
On a Mac, you can use Time Machine to create a full system backup. Time Machine will regularly back up everything on your Mac – documents, photos, applications, settings, etc [1].
On Windows, utilize the built-in File History tool to back up files and folders you specify onto an external drive. File History can back up photos, music, videos, documents, Desktop folders, and more [2].
Third party backup software like Acronis True Image or Macrium Reflect can also be used to create full disk image backups on either Mac or Windows.
Be sure to run a manual backup to create a restore point before connecting the Seagate drive and transferring any files. This safeguards the new computer and provides options if anything goes wrong.
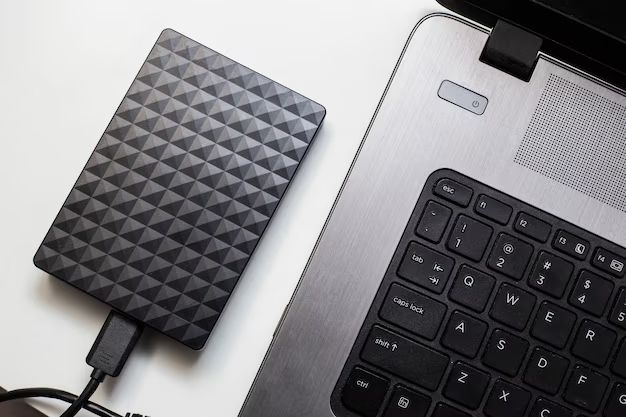
Connect Seagate Backup Drive to New Computer
To connect your Seagate backup drive to your new computer, you will need the USB cable that came with your Seagate drive. Most Seagate backup drives use a USB 3.0 or USB-C cable to connect to a computer’s USB port. Make sure your new computer has an available USB 3.0, USB-C, or Thunderbolt port to connect the Seagate drive.
First, plug the larger end of the Seagate USB cable into the port on the back of the Seagate drive. This is usually labeled with a USB symbol. Then, plug the smaller end of the USB cable into an available USB port on your new computer. The USB port on a computer is typically a rectangular slot or receptacle. Refer to your computer manual if you are unsure of the USB port location.
Once the Seagate drive is plugged into your new computer, you may hear a chime or notification that a new device has been connected. Your computer should automatically recognize the Seagate backup drive. Now you can access the files on the drive from your new computer.
For more details, refer to the Seagate product manual or this Seagate support article on using external drives.
Access Backup Drive on New Computer
The process for accessing an external backup drive will differ slightly depending on whether you are using a Mac or Windows PC.
On a Mac, external drives will usually appear automatically on the desktop. You can also find them by going to Finder > Devices. Double click the external backup drive to access the files.
On a Windows PC, external drives may not appear automatically. Go to File Explorer or This PC to locate the backup drive. It will likely be listed under Devices and Drives or External Storage Devices. Double click on the drive icon or right-click and select Explore to access the files.
If the backup drive still does not appear, try the following:
– Disconnect and reconnect the drive.
– Use a different USB port.
– Restart your computer.
– Update your USB drivers.
– Check if the drive needs external power.
– Try connecting the drive to a different computer.
Once connected properly, the external backup drive should be accessible in the same way as other storage drives on your system. You can browse and manage the files through your computer’s file manager.
For more details, refer to:
How to Access an External Hard Drive on Windows 10
Locate Files to Transfer
The files from your Seagate backup drive are stored in a specific folder structure that you’ll need to navigate. On the Seagate drive, open the Toolkit folder, then open the Backup folder. Within the Backup folder, you’ll find folders organized by date with names like “2020-11-05” depending on when the backup was performed.
Open the date folder corresponding to the backup you want to transfer files from. This folder contains the actual backup files organized into folders like Documents, Music, Pictures, and Videos. Navigate to the specific folder containing the files you want to transfer.
The filenames of the actual backup files follow the naming convention “[PC name] – [file path and name]. Files like “MyPC – C:\Users\Name\Documents\Resume.docx” indicate a file backed up from your computer. Locating files this way allows you to easily identify the original source and path of each backup file.
Once you’ve navigated to the folder containing the backup files you want to transfer, you can select and copy them over to your new computer.
Select and Copy Files to New Computer
Once you have located the files and folders you want to transfer from the Seagate backup drive to the new computer, it’s time to select them and copy them over.
You can select multiple files and folders by holding down the Ctrl key on your keyboard while clicking on each item you want to transfer. To select a range, click on the first item, hold Shift, and click the last item.
With your desired files and folders highlighted, right click and select Copy (or use the Ctrl+C keyboard shortcut). This copies the selected items to your computer’s clipboard.
Now navigate to the location on your new computer where you want to transfer the files. This could be your Documents folder, Pictures folder, or a specific folder you have created to store the transferred items.
Right click in the destination folder and select Paste (or use the Ctrl+V keyboard shortcut) to transfer the files from the Seagate backup drive. You can also drag and drop selected files to the destination folder.
Take your time and double check that all the files and folders have transferred successfully. The copy process may take some time depending on the amount of data.
If you encounter errors or issues copying certain files, try again or make note so you can attempt to transfer them separately.
Transfer File Ownership
It is important to transfer ownership of the files you want to move from your Seagate backup drive to your new computer. This ensures you maintain full control over the files after transferring them. The steps to transfer ownership differ slightly between Windows and Mac.
On Windows
To transfer ownership of files on Windows:
- Right click on the file or folder and select Properties.
- Go to the Security tab and click Advanced.
- Click Change next to the owner name and enter your username on the new computer.
- Check the Replace owner on subcontainers and objects box.
- Click OK and apply the changes.
This will transfer ownership of the files from your old user profile to your new user profile on the new computer.
On Mac
To transfer ownership on Mac:
- Get info on the file or folder by selecting it and pressing Command+I.
- Expand the Sharing & Permissions section.
- Click the lock icon to unlock it.
- Enter your administrator name and password.
- Select your username under Ownership and click the gear icon to apply to enclosed items.
This changes owner permissions recursively to your user account on the new Mac.
Following these steps ensures you maintain full ownership and access to the files after transferring them to your new computer.
Safely Eject Seagate Backup Drive
Before physically disconnecting your Seagate backup drive, it is important to properly eject it first. Simply unplugging the drive before ejecting can lead to file corruption or data loss.
On Windows, right-click on the Seagate drive icon and select “Eject”. You can also go to File Explorer, right-click the drive, and select “Eject”. See Microsoft’s guide for more details on safely removing hardware in Windows.
On Mac, click the eject button next to the Seagate drive icon on your desktop or in the Finder sidebar. You can also right-click the drive icon and select “Eject”. For more tips, see this guide on safely ejecting an external hard drive on Mac.
Ejecting the Seagate backup drive properly prepares it for safe removal and helps prevent any data issues. Avoid simply unplugging the drive without ejecting first.
Locate Transferred Files on New Computer
Once the file transfer process is complete, you will need to navigate to the location where the files were transferred on your new computer in order to access them.
If you transferred the files directly to the desktop or a specific folder, simply open that location in File Explorer or Finder to view the transferred files. However, if you used the default settings when transferring, the location of the files may depend on the operating system:
- On Windows, transferred files are often saved to the C:\Users\Public\Documents folder by default.
- On Mac, transferred files from a Windows PC are saved to the /Users/Shared folder
You can also use the search function in File Explorer or Finder to locate files if you are unsure of the exact folder they were transferred to. Simply search by file name or keyword.1
Once located, double click on any transferred file to open it up on your new computer and confirm it transferred properly.
Conclusion
In summary, the main steps we covered for transferring files from a Seagate backup drive to a new computer included:
- Backing up the new computer before beginning the transfer
- Connecting the Seagate drive and accessing it on the new computer
- Locating and selecting the files to transfer
- Copying the files over and transferring file ownership
- Safely ejecting the Seagate drive
- Finding the transferred files on the new computer
Some additional tips for a smooth file transfer process: check available storage space on the new computer beforehand, organize files into folders before copying, transfer smaller batches if moving many large files, verify transfers completed properly, and avoid disconnecting the drive mid-transfer.
Remember to continue backing up your new computer regularly after the initial transfer, as new files are created or changed. Maintaining a current backup allows you to restore lost or damaged data if needed.
