Keeping your computer running smoothly and efficiently is important. Over time, unnecessary files and data can accumulate and slow down your PC. Doing regular disk cleanups is a great way to free up storage space and improve performance.
In this comprehensive guide, we will walk through how to use the Disk Cleanup utility in Command Prompt to clean your hard drive. By following these steps, you can easily remove unnecessary files, old Windows installation files, temporary files, and more. Let’s get started!
What is Disk Cleanup?
Disk Cleanup is a built-in Windows tool that searches your hard drive for files that can be safely deleted to free up space. This includes:
- Temporary internet files
- Downloaded program files
- Temporary files
- Recycle Bin files
- System error memory dumps
- Setup log files
- Old Windows update installation files
Deleting these unused files can recover a significant amount of hard drive space and help your computer run faster. The Disk Cleanup utility provides an easy way to find and remove these files.
Why Use Disk Cleanup?
There are a few key reasons you should use Disk Cleanup regularly:
- Frees up storage space – By removing unnecessary files, Disk Cleanup can recover gigabytes of hard drive space.
- Improves performance – With more free space, your computer will run faster and smoother.
- Increases security – Temp files and browsing history contain sensitive information that could be exploited by hackers if left on your system.
- Makes backups faster – Less data to backup means quicker and smaller system backups.
As your hard drive space gets low, your computer’s performance will degrade. Doing regular disk cleanups helps prevent this.
How to Use Disk Cleanup
There are a couple ways to access Disk Cleanup:
- Open File Explorer, right click the C: drive, and select Properties > Disk Cleanup
- Search for “Disk Cleanup” in the Start Menu and select the desktop app
- Use the
cleanmgrcommand in Command Prompt (instructions below)
Running Disk Cleanup through Command Prompt with the cleanmgr command allows you to automate the cleaning process using scripts and batch files. Here is how to do it:
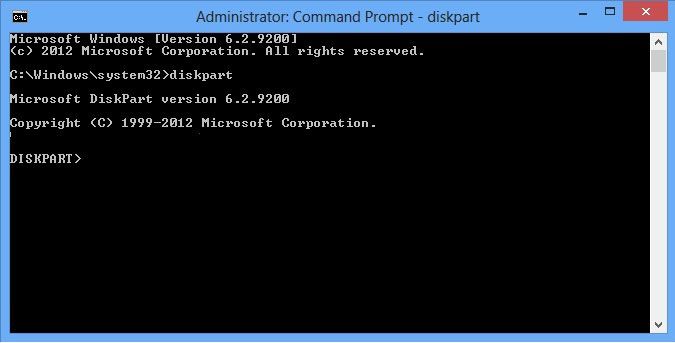
Step 1: Open Command Prompt as Administrator
Disk Cleanup requires elevated privileges to function. To open an admin Command Prompt window:
- Press Windows key + X and select “Command Prompt (Admin)”
- Or search for “Command Prompt”, right-click it, and select Run as Administrator
Step 2: Run the cleanmgr Command
In the Command Prompt, run:
cleanmgr /sagerun:1
This will start the Disk Cleanup utility and scan your volumes for files to remove.
The /sagerun parameter runs Disk Cleanup in a quiet mode without a user interface. You can replace 1 with a different volume number if you want to scan a different drive.
Step 3: Review Disk Cleanup Report
After scanning completes, Disk Cleanup will generate a text report with the amount of space that can be recovered from each type of file.
For example:
Recycle Bin Info:
  Number of objects purged:              54
  Space reclaimed:                       32 MB
Temporary Files and Recycle Bin Info:
  Space reclaimed:                       4.2 GB
System Files Info:
  Space reclaimed:                       1 MB
Downloaded Program Files Info:
  Space reclaimed:                       0 B
Windows Update Cleanup Info:
  Space reclaimed:                       1.5 GB
Windows Upgrade Log Files Info:
  Space reclaimed:                       0 B
Driver and Setup Log Files Info:
  Files found:                           195
  Space reclaimed:                       2 MB
This shows you how much space can be reclaimed from temporary files, the Recycle Bin, old Windows updates, etc.
Step 4: Run Disk Cleanup with /autoclean
To actually delete the unnecessary files found during the scan, run:
cleanmgr /autoclean
This will automatically clean up all of the file categories shown in the report from the previous step.
You can also target just specific file types by adding parameters:
cleanmgr /autoclean TEMPFILES
Replace TEMPFILES with any of the CLEANUP types from the report: TEMPFILES, RECYCLEBIN, DOWNLOADEDPROGRAMFILES, SPSETUPFILES, SPUSETUPFILES, or CLUSTERFILES.
Tweaking Disk Cleanup Settings
You can customize Disk Cleanup by tweaking some registry settings related to the utility.
For example, to make Disk Cleanup target more file types, you can add keys under HKEY_LOCAL_MACHINE\SOFTWARE\Microsoft\Windows\CurrentVersion\Explorer\VolumeCaches.
Some common tweaks include:
- OldPrefetchData – Deletes Prefetch files over 30 days old. Helps limit folder size.
- Setup Log Files – Removes Windows 10 upgrade log files.
- BranchCache – Clears outdated BranchCache content.
- ContentIndex Files – Removes unneeded search index data.
There are also settings to have Disk Cleanup remove files from certain folders like Recent docs or Temporary burn folders. Refer to Microsoft’s documentation for more details on these settings.
Automating Disk Cleanup
Manually running Disk Cleanup using the Command Prompt each time is tedious. For convenience, you can automate the disk cleaning process a few different ways:
1. Create a Batch Script
A simple .bat file will run Disk Cleanup commands on a schedule. For example:
@echo off
cleanmgr /sagerun:1
cleanmgr /autoclean
Save this to a file like cleanup.bat and run it on demand or setup a Scheduled Task to run it daily or weekly.
2. Use Task Scheduler
You can create an automated task in Windows Task Scheduler that will run Disk Cleanup on a set recurrence.
To do this:
- Open Task Scheduler
- Create a new Basic Task
- Set a name like “Disk Cleanup”
- Triggers – Set to run daily, weekly, etc.
- Action – Start a program: cleanmgr.exe
- Parameters:
/autoclean - Conditions – Run whether user is logged in or not
- Settings – Run with highest privileges
Now Disk Cleanup will automatically run on the set schedule.
3. Use Third-Party Automation Tools
Utilities like PowerShell DSC or PDQ Deploy allow creating scripts to remotely run Disk Cleanup on many PCs. This is useful for automated maintenance in corporate environments.
Conclusion
Using Disk Cleanup regularly is important to maintain your computer’s performance. The cleanmgr command provides an easy way to automate the disk cleaning process using Command Prompt.
Some key points:
- Run
cleanmgr /sagerun:1first to scan volumes and view space usage - Then use
cleanmgr /autocleanto remove unneeded files - Set up automated Batch scripts or Scheduled Tasks
- Adjust registry settings to target additional file types
With an optimized disk cleanup routine, you can recover valuable disk space and keep your Windows PC running smoothly.
