SSDs, or solid-state drives, are a type of storage device used in computers that offer significant advantages over traditional hard disk drives (HDDs). They use flash-based memory rather than magnetic platters to store data, making them much faster, quieter, and less prone to mechanical failure than HDDs. With no moving parts, SSDs also tend to be more power-efficient and durable. The most common SSD formats include SATA, mSATA, M.2, and NVMe, each with their own shape, size, and performance characteristics. The goal of this article is to examine each of these SSD formats and provide a recommendation for the ideal type of SSD for Mac users based on performance needs and hardware compatibility.
SSD Basics
SSD stands for solid-state drive. It is a type of storage device that uses flash memory instead of a spinning hard disk to store data. SSDs have no moving parts and data is stored on microchips. This makes SSDs much faster and more durable than traditional HDDs (hard disk drives).
Some key pros of SSDs compared to HDDs include:
- Speed – SSDs can achieve much faster read/write speeds because there are no moving mechanical parts. Applications and files load almost instantly on an SSD. According to Backblaze, SSDs have typical sequential read/write speeds of around 500 MB/s compared to HDDs at 100-200 MB/s.
- Durability – With no moving parts, SSDs are more resistant to shock, vibration, and extreme temperatures. They can withstand accidental drops that would damage an HDD.
- Size – SSDs have a much smaller physical profile allowing for ultra-slim laptop and device designs. A 1 TB SSD takes up much less space than a 1 TB HDD.
Overall, the speed, durability, and compact size make SSD an appealing choice over traditional hard drives for many users.
Common SSD Formats
There are several common form factors for SSDs on the market today:
SATA
SATA SSDs use the standard SATA interface and come in the traditional 2.5-inch form factor. These are the most common and affordable SSDs. They connect via a SATA cable to a computer’s motherboard just like a traditional hard drive. SATA SSDs offer capacities up to 4TB and sequential read/write speeds around 550/520 MB/s.1
mSATA
mSATA SSDs are designed for smaller devices and have a much smaller physical footprint than standard 2.5-inch SATA SSDs. mSATA drives are about the size of a stick of RAM and plug directly into an mSATA slot on a computer’s motherboard. Capacities typically range from 32GB to 1TB.2
M.2
M.2 SSDs are tiny, rectangular-shaped drives that mount directly onto a computer’s motherboard. There are several lengths available including 2230, 2242, 2260, 2280, and 22110 which correspond to the physical size in mm. M.2 SSDs connect via PCIe lanes and offer very fast sequential read/write speeds over 1500 MB/s. Capacities range from 120GB to 2TB.3
NVMe
NVMe or Non-Volatile Memory Express SSDs utilize the PCIe interface for improved performance over SATA. These M.2 drives offer incredible sequential read/write speeds up to 3500/3000 MB/s and very low latency. They are the fastest type of SSD ideal for high performance computing.3
SATA
SATA, short for Serial Advanced Technology Attachment, is a storage interface used in many Mac computers to connect SSDs to the motherboard. SATA SSDs are the oldest SSD format and use a SATA connector which looks very similar to the connectors used for traditional hard drives (Compatible SSD).
Many older MacBook Pro, MacBook Air, and iMac models use 2.5-inch SATA SSDs. Macs from around 2012 and earlier usually require a SATA SSD for compatibility. For example, the 2012 MacBook Pro 15-inch and the 2013 MacBook Air 11-inch use SATA SSDs (Compatible SSD). However, newer Macs starting in 2016 began transitioning away from SATA to faster interfaces like PCIe (Mac SSD Upgrade Compatibility Guide). When upgrading the SSD in an older Mac, it’s important to verify it uses a SATA interface before purchasing a SATA SSD.
mSATA
mSATA, which stands for Mini-SATA, is a smaller, compact version of the standard SATA interface. mSATA SSDs are about the size of a stick of gum and designed to fit in smaller devices like ultrabooks and tablets. The mSATA interface uses the standard SATA protocol but condenses it down to a much smaller physical connector.
mSATA SSDs can be a great option for certain Mac models that support the interface. For example, the 2012-2015 MacBook Pro and MacBook Air models with Retina display have an mSATA slot that can accommodate an SSD. Installing an mSATA SSD allows you to increase the internal storage capacity. The MacBook Air’s mSATA slot is primarily intended for the MacBook Air’s SSD. But using an mSATA to USB adapter, you can remove the stock mSATA SSD and replace it with a larger capacity mSATA SSD up to 1TB.
For iMac models, you can use an mSATA to SATA adapter to add an additional mSATA SSD. This gives you more internal storage capacity. The adapter coverts the mSATA connection to a standard SATA interface. Then you can install the extra SSD in the open 2.5-inch drive bay.
M.2
M.2 SSDs utilize the M.2 form factor, which is a compact stick-of-gum sized module that plugs into a slot on the motherboard. M.2 offers fast performance and a small footprint, making it a popular choice for newer Macs. There are two main types of M.2 SSDs to consider for Mac: SATA and NVMe.
M.2 SATA SSDs connect over the SATA interface, providing speeds around 500-550 MB/s. While faster than a traditional 2.5″ SATA drive, these do not fully utilize the capabilities of M.2. This is mainly seen in older Macs or lower-cost M.2 drives.(1)
M.2 NVMe SSDs connect via PCIe lanes and can reach blazing fast speeds over 3,000 MB/s. This allows them to fully take advantage of the M.2 form factor. NVMe drives require NVMe support on the motherboard and are found on newer Macs like the MacBook Pro, iMac, and Mac Studio. M.2 NVMe provides top performance and is the recommended M.2 format for most Mac users.(2)
NVMe
NVMe (Non-Volatile Memory Express) is a storage protocol designed specifically for SSDs to enable faster speeds and lower latency. NVMe was introduced in 2011 to replace the SATA and SAS interfaces which were limiting SSD performance.
NVMe SSDs connect directly to the PCIe bus which provides much higher bandwidth compared to SATA SSDs. This allows NVMe SSDs to reach incredible speeds, with sequential reads up to 7000 MB/s and writes up to 5000 MB/s. In comparison, SATA SSDs max out around 550 MB/s.
NVMe also reduces latency and overhead substantially compared to SATA. The queue depth for NVMe is 64K whereas SATA is limited to 32. This allows the SSD to process many more simultaneous requests and further boosts performance.1
Overall, NVMe SSDs deliver exceptional speeds, very low latency, and optimized performance for SSD storage. For Mac users wanting the fastest SSD speeds, NVMe is the clear choice.
Recommendation
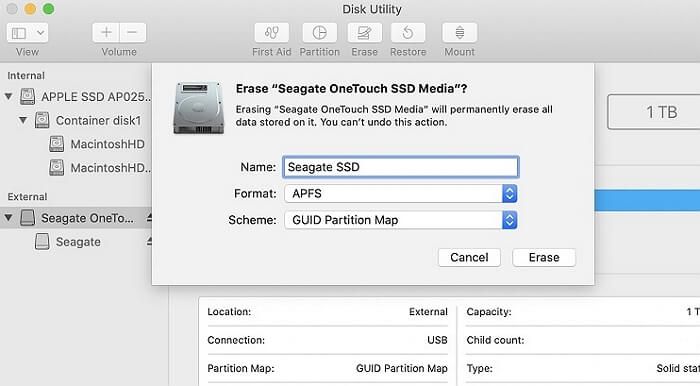
For most Mac users, the best overall format for an SSD is APFS (https://www.minitool.com/data-recovery/best-format-for-external-hard-drive-mac.html). APFS stands for Apple File System and is the default file system for SSDs on modern versions of macOS.
APFS is optimized specifically for flash/SSD storage and solid state drives. It provides strong encryption, space sharing, fast directory sizing, and improved file system fundamentals like crash protection (https://discussions.apple.com/thread/254824482).
By using APFS, you can take full advantage of the speed and performance improvements of SSDs on a Mac. Older formats like HFS+ and FAT32 do not fully support SSDs and can lead to slowdowns. APFS also has improved compatibility with the latest macOS features.
The one downside is APFS does not have native read/write support on Windows. But overall, for Mac users who want the best SSD performance, APFS is highly recommended as the format.
Installation Guide
Installing an SSD into a Mac computer is a straightforward process with the right tools and preparation. Here are the steps to install an M.2 SSD into a Mac:
1. Backup your data
Before beginning, make sure to fully backup your Mac’s data and settings using Time Machine or another backup utility. This will allow you to transfer your data over once the new SSD is installed.
2. Purchase an M.2 SSD
Select a compatible M.2 SSD based on your Mac model’s requirements for size, form factor, and interface. Refer to Apple’s specs or a compatibility guide.
OWC and Samsung make reliable M.2 SSDs for Macs.
3. Gather necessary tools
You will need a Phillips #00 screwdriver, tweezers, an external SSD enclosure or dock, and a precision flat tool like a spudger to pry open the MacBook casing.
4. Follow disassembly steps
Follow an online visual guide for safely disassembling the specific Mac model to access the internal SSD bay. Work slowly and carefully.
5. Swap out the SSD
Disconnect and remove the old SSD, then insert the new SSD into the slot and secure it. Reassemble the Mac.
6. Install macOS
With the SSD installed, restart the Mac into Recovery mode and install a fresh copy of macOS on the new drive.
7. Migrate data
Use Migration Assistant to transfer apps, documents, settings, and other data from a Time Machine backup or external drive to the new SSD.
With these steps, you can successfully upgrade a Mac to a faster, higher capacity SSD for improved performance.
Conclusion
In summary, the three main SSD formats compatible with Mac are SATA, M.2, and NVMe. SATA SSDs offer a balance of speed, reliability, and affordability. M.2 and NVMe SSDs are newer, faster interfaces but come at a higher cost. For most users, a SATA SSD like the Samsung 870 EVO provides excellent performance for day-to-day use.
When choosing an SSD, consider your budget and performance needs. Lower capacity SSDs around 250GB to 500GB are well-suited for most users looking to run their operating system and everyday applications. For power users, creative professionals or gamers, higher capacity 1TB+ SSDs allow you to store large files and access them quickly.
M.2 and NVMe SSDs are recommended for demanding tasks like 4K video editing, 3D modeling, gaming and running virtual machines. But for general home and office use, a SATA SSD offers the best value.
Lastly, research SSD models for compatibility and reliability before purchasing. Ask other Mac users in forums or read professional reviews. With the right SSD installed, you can give your Mac a new lease of life.
