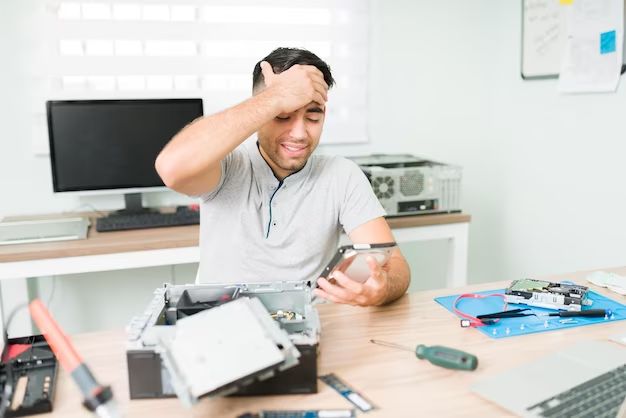
Having an undetected hard drive can be frustrating and worrying. Your important files and data may be inaccessible, and you may not know how to get your hard drive working again. The good news is that there are several troubleshooting steps you can take to try to get your hard drive detected again.
Quick Overview: Common Reasons a Hard Drive is Not Detected
Here are some of the most common reasons a hard drive may not be detected:
- Loose connections – Power or data cables may be loose or disconnected. Reconnect cables firmly.
- Outdated drivers – Your system may need updated motherboard drivers.
- Failed drive – The hard drive itself may be dead or damaged.
- BIOS settings – Drive may be disabled in BIOS.
- Insufficient power – The drive may not be getting enough power.
Step 1: Check Your Connections
The first step is to check whether your hard drive cables are properly and securely connected. A loose data or power cable is one of the most common reasons a drive is not detected.
Follow these tips for checking connections:
- Turn your computer off and unplug the power cable.
- Open the PC case and locate the hard drive.
- Check that both the power cable and data cable are pushed all the way into the hard drive.
- Follow the cables to the motherboard and make sure they are securely inserted into the motherboard connectors.
- Double check that the connectors are tight and snapped into place.
- Secure any loose connectors by pressing down firmly. Ensure the connectors are properly aligned with the ports.
- Replace any damaged cables.
Cables can sometimes come loose if they are worn or frayed. If reseating the connectors does not work, inspect the cables for damage. Replace any cables that are bent, torn or cracked. Damaged cables can prevent the drive from getting power or communicating with the motherboard.
Step 2: Update Your Drivers
If checking the cables does not resolve the issue, the next thing to try is updating your system drivers. Outdated, buggy or missing drivers can prevent a hard drive from being detected properly.
Follow these steps to update your drivers:
- Open Device Manager on your Windows PC. You can access Device Manager by right-clicking on Start and selecting it from the menu.
- Expand the Disk drives category.
- Right-click on the hard drive in question and select Update driver.
- Select Search automatically for updated driver software.
- Allow Windows to search online and install any available driver updates. Restart your PC afterwards.
- If automatic updating does not find a new driver, visit your motherboard or hard drive manufacturer’s website. Look for a driver update utility or manual driver downloads.
- Install any available driver updates for your hard drive or motherboard storage controllers. Restart when complete.
Keep in mind that Windows Update will also download and install some driver updates. Make sure you have the latest Windows updates installed as well.
Step 3: Reseat the Hard Drive
If your drive is still not detected, temporarily remove and reseat the hard drive. This step re-establishes the connections and can resolve detection issues.
Here is how to reseat a hard drive:
- Shut down your computer and unplug power cable.
- Ground yourself by touching metal case to discharge static.
- Open the case side panel.
- Locate the hard drive and disconnect SATA and power cables.
- Remove any screws securing the drive in the bay.
- Gently pull drive from bay.
- Check for any visible damage to drive or cables.
- Reinsert hard drive firmly into bay.
- Replace mounting screws to secure in place.
- Carefully reconnect data and power cables.
- Close case side panel and restart computer.
Reseating clears up loose connections and renews contact between the drive and data/power ports. If detected after reseating, the drive likely just had a temporarily loose connection.
Step 4: Test With Another Computer
Verify whether the undetected drive is the issue by connecting it to another computer.
To test on another system:
- Use a SATA adapter or external enclosure to connect the hard drive to another PC.
- Power up the second computer with the hard drive attached.
- Check if the hard drive appears in Windows File Explorer.
- Try viewing the contents and accessing files on the drive.
- If the hard drive works normally on a second system, the issue lies with the original computer. More troubleshooting is needed.
- If the hard drive still does not detect, the drive itself is likely faulty and should be replaced.
Step 5: Run CHKDSK
For drives that do show up but have data access or corruption issues, run the CHKDSK utility.
CHKDSK scans and repairs drive errors. To run it:
- Open the Command Prompt as administrator.
- Type “chkdsk X: /f” where X is the letter of your hard drive.
- Allow CHKDSK to run and repair any found errors.
- After it completes, restart your PC and test the drive again.
CHKDSK fixes many drive issues like bad sectors, cross linked files, directory errors, and file system corruption. The /f parameter does a thorough scan and repairs any problems found.
Step 6: Check for Viruses
Viruses and malware can sometimes prevent a hard drive from being accessed or detected properly. Use antivirus software to scan for infections:
- Download and install a reputable antivirus program like Malwarebytes.
- Update virus definitions and run a full system scan.
- Quarantine or remove any infections found.
- Restart your computer afterwards.
Drive-disabling viruses are becoming more rare these days. But a virus scan can identify and remove malware that may be impacting drive connectivity and performance.
Step 7: Try a Different SATA Cable
Damaged SATA cables can prevent drives from communicating properly with the motherboard. Try replacing the SATA data cable:
- Shut down computer and switch off power supply.
- Unplug the existing SATA data cable from the motherboard and hard drive.
- Replace with a brand new SATA cable.
- Firmly connect new cable to motherboard and drive ports.
- Power system back on and check if hard drive is detected.
Use a high quality, undamaged SATA cable. Premium SATA cables provide more reliable connectivity and signal clarity over cheap discount cables.
Step 8: Update BIOS
An outdated system BIOS can also prevent proper drive detection. Flash your BIOS to the latest available version:
- Go to your motherboard manufacturer’s website.
- Navigate to the Support section and locate BIOS updates.
- Download the latest BIOS version.
- Follow provided instructions to update the BIOS.
- Restart the computer and test for drive detection.
New BIOS versions patch bugs, expand compatibility, and improve device support. Updating the BIOS is worth trying if your hard drive previously worked but now does not detect.
Step 9: Switch SATA Ports
Connect the hard drive to a different SATA port on your motherboard. This helps determine if the original port is faulty:
- Label or photograph where SATA data and power cables are currently connected.
- Disconnect cables from their current ports.
- Plug the SATA data cable into a different available motherboard port.
- Reconnect the power cable to the drive.
- Boot up the computer and see if drive is now detected.
If the hard drive is now detected, the original SATA port is likely damaged. Contact your motherboard manufacturer about repairs.
Step 10: Try a New Power Supply
Insufficient power can cause connectivity issues with hard drives. Test with a different power supply unit if possible:
- Unplug computer and switch off the power supply.
- Open case and detach all power cables from hardware.
- Remove existing supply and install a new compatible unit.
- Reconnect only the motherboard power connector and hard drive.
- Power up computer and check if hard drive now detects properly.
If the drive functions with a new power supply, the original PSU likely was not providing stable power to your system components.
Step 11: Check Motherboard Manual
Consult your motherboard manual for hard drive troubleshooting tips:
- Download the PDF manual for your specific motherboard model.
- Search the manual for relevant sections on hard drive detection issues.
- Follow any troubleshooting steps provided.
- Look for instructions on drive configurations in BIOS.
The motherboard manual contains validated solutions from the manufacturer. It may describe BIOS settings, jumper configurations, or wiring diagrams to help diagnose detection problems.
Step 12: Remove Non-Essentials
Remove unnecessary components to simplify troubleshooting:
- Open computer case and unplug all drives, cards, and cables not vital to operation.
- Leave just one stick of RAM, video card, CPU cooler, and problematic drive.
- Boot up system and check if drive now detects.
By removing non-essential hardware, you eliminate those components as possible causes. This simplifies the troubleshooting process.
Step 13: Try Testing Software
Use diagnostic software to analyze and test your hard drive:
- Download drive testing software like SeaTools for Windows.
- Install and launch the software.
- Have it scan for connected disk drives.
- Run the appropriate test for your hard drive.
- Read the test results and determine if the drive has failed.
Testing software checks drive health, performance, and functionality. It can confirm if your hard drive has truly failed and needs replacement.
Step 14: Look for Physical Damage
Closely inspect your hard drive for any external damage:
- Look for cracks, dents or warping of the drive enclosure.
- Open the enclosure if possible and check inside for issues.
- Examine circuit board for signs of damage.
- Check interface connectors to make sure pins are not bent.
Physical damage from impacts can prevent a drive from working properly. The damage may be repairable, but a severely damaged drive likely needs professional data recovery and replacement.
Step 15: Try a Different Drive Slot
If using a desktop with multiple drive bays, insert the hard drive into a different vacant slot:
- Power down and open case.
- Remove data and power cables from non-detecting drive.
- Slide hard drive into a different open bay.
- Secure in place and reconnect cables.
- Boot up PC and check if hard drive is detected.
This confirms whether the original bay’s connections are faulty. If the drive is now detected, the bay may need serviced or replaced if damaged.
Step 16: Initialize the Drive
Use Disk Management to initialize a brand new hard drive:
- Go to Start > Type “disk management” > Click Create and format disk partitions.
- Right-click space indicating unallocated drive and select Initialize Disk.
- Follow prompts to initialize the disk to either MBR or GPT type.
Brand new drives must be initialized before they can be detected and formatted. Initializing writes partition structures needed for the OS to interact with the drive.
Step 17: Enable SATA in BIOS
Make sure SATA controller and ports are enabled in BIOS:
- Reboot and press needed key to enter BIOS, such as Delete or F2.
- Navigate to advanced settings and find SATA or onboard device configuration.
- Enable SATA controller and ensure hard drive’s SATA ports are enabled.
- Save changes and exit BIOS.
Some motherboards allow SATA ports to be disabled. Double check BIOS to make sure the drive’s port is actually enabled.
Step 18: Partition and Format
Use Disk Management to partition and format the drive if necessary:
- Go to Start > Type “disk management”.
- Right-click the disk space and select New Simple Volume.
- Follow the prompts to initialize, partition, and format the disk space.
For brand new drives or drives needing reconfiguration, this step prepares the drive for normal usage. The OS can then interact with the formatted volume.
Step 19: Replace Drive Cables
Try brand new SATA data and power cables for your hard drive:
- Purchase new high quality SATA data and power cables.
- Shut down computer and switch off power supply.
- Unplug existing data and power cables.
- Plug in the new replacement cables.
- Boot up PC and check if hard drive now detects properly.
Even brand new cables can sometimes be faulty. Swapping in known good cables can rule out cable issues.
Step 20: Contact Technical Support
If the above steps do not resolve the detection problem, contact the drive manufacturer’s technical support:
- Look up hard drive manufacturer support contacts.
- Call, email, chat, or message support explaining the issue.
- Provide computer details, troubleshooting steps attempted, and drive information.
- Inquire about RMA and data recovery options if drive is still in warranty.
The manufacturer’s tech support team may be able to provide specialized troubleshooting steps specific to your make and model of drive.
Conclusion
Troubleshooting hard drive detection issues requires patience but typically can resolve common problems. Following connection, software, configuration and hardware steps can get a failed drive working again. If the drive still does not detect after exhausting repair options, data recovery and replacement may be necessary.
