What Does “Disk is Write-Protected” Mean?
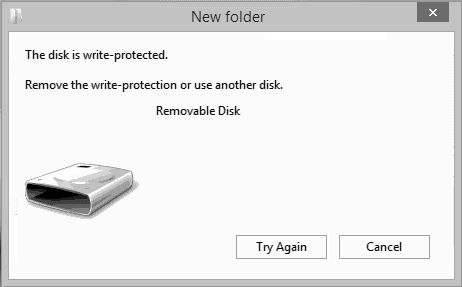
The “Disk is write-protected” error message indicates that the disk or storage device you are trying to write data to is currently in a read-only state where modifications cannot be made (Lenovo). Write-protection is a feature that prevents files on a disk from being altered, deleted, or copied in order to protect the integrity of the data. It makes the disk read-only.
By default, disks are read-write, which means data can be both read from the disk and written/saved to it. When write-protection is enabled, the disk becomes read-only – existing data can be read but no new data can be written or saved. The write-protection blocks any commands or operations that could modify data on the disk.
Write-protection is useful for preventing accidental or unauthorized changes to sensitive data. It protects against corruption and ensures the original data remains intact. However, it can cause errors if you attempt to install software, save files, or make changes to a write-protected disk. Understanding what is causing the write-protection and how to properly disable it is key to resolving the issue.
Common Causes
There are a few common causes behind the “disk is write-protected” error message:
Physical Write Protection Switch
Some external hard drives and USB flash drives have a physical switch or tab that toggles write protection on and off. If this switch is slid to the “lock” position, it will prevent writing data to the disk and result in a “disk is write-protected” error [1]. Simply sliding the switch back to the unlocked position can fix the issue.
File Permissions
The error can also occur if you don’t have permission to write to the disk. For example, if you are trying to write to a disk formatted with NTFS permissions, you may get the error if your user account lacks write access. Checking the permissions and making sure your account has write privileges for the disk can resolve this [2].
Damaged or Corrupted Disk
If the disk has become damaged or corrupted, either due to physical issues or file system errors, it may trigger the “write-protected” error even if no write protection is enabled. This typically requires professional data recovery services to attempt fixing the disk and recovering its contents.
Physical Write Protection Switch
Many memory cards and USB flash drives have a physical write protection switch that controls whether the device is write protected or not. The switch is typically located on the side of SD cards and microSD cards. For CompactFlash cards, the switch may be on the top or side. On USB flash drives, the switch is usually on the end opposite the USB connector.
The switch often slides between two positions or has a small tab you can toggle. One position enables writing to the device, while the other position locks it as read-only. Consult your device’s manual to verify, but commonly the switch down or slid towards the contacts locks writing, while up or slid away allows writing. On some devices, it may be the reverse.
To remove the write protection, simply slide the switch to the unlocked position. Be gentle to avoid damaging the switch or contacts. If your device lacks a physical switch, then software write protection is likely causing the issue instead. Consult your device documentation and markings to confirm if a hardware switch is present and its orientation.
Sources:
https://www.integralmemory.com/faq1/my-sd-card-is-write-protected-how-do-i-unprotect-it/
https://www.makeuseof.com/tag/remove-write-protection-sd-card/
File Permissions
File and folder permissions can sometimes cause the “disk is write-protected” error. This often happens if system or hidden files on the drive have restricted permissions that prevent writing. It can also occur if the disk is only writable for a specific user account.
To fix permission issues, you need to make the disk writable for all users. On Windows, open File Explorer, right-click on the drive, and select Properties. Go to the Security tab and click Advanced. Here you can see and modify permissions, including for system and hidden files. Make sure the disk is not read-only and all user groups have full access. You may need to take ownership of files or grant yourself fuller permissions first.
Adjusting permissions in the Security tab should resolve any issues caused by restrictive file and folder access. Just be sure to avoid removing important inheritances or permissions needed for system files. See [cite source 1] and [cite source 2] for more details on modifying file permissions to fix the write-protected error.
Damaged or Corrupted Disk
A damaged or corrupted disk is another common cause of the “disk is write-protected” error. Signs of physical damage to the disk include strange noises when the disk spins, the disk not spinning up at all, or visible scratches or dents on the disk’s surface. Physical damage can prevent the disk from being written to.
To fix a physically damaged disk, you may need professional data recovery services. But for a corrupted disk with no physical damage, you can try running the CHKDSK utility to scan and repair errors. According to this source, running “chkdsk /f /r /x” in Command Prompt can help resolve CHKDSK errors on a write-protected disk.
If CHKDSK is unable to repair the corruption, you may need to reformat the disk entirely after backing up your data. Reformatting will erase the disk and create a new blank file system, resolving any software corruption. Just be aware that reformatting results in data loss.
Software Conflicts
One common cause of the “disk is write-protected” error is conflicts with antivirus or backup software. These programs may have settings that mistakenly flag external drives or certain folders as read-only. For example, some antivirus software like Windows Defender will automatically quarantine infected files and restrict writing to them. The antivirus may also mistakenly identify your external drive as infected and block writing to it.
To fix this, you first need to check your antivirus or backup software settings. Look for options related to quarantining, restricting access to, or write-protecting specific drives or folders. Temporarily disable these settings or whitelist your external drive to allow write access. You may need to uninstall the software if settings cannot be adjusted.
According to this source, some users have also resolved “disk is write-protected” errors by completely disabling their antivirus software, reformatting the drive, and then re-enabling the antivirus. This essentially gives the drive a fresh start. Just remember to backup your data first.
If adjusting antivirus settings does not work, the software itself may be corrupted and blocking writes. Try reinstalling your antivirus or backup software before further troubleshooting.
Incorrect Drive Letter Assignment
One potential cause of the “disk is write-protected” error is if the drive letter assigned to your disk does not match what the system expects. Windows reserves certain drive letters like C: for system drives. If a removable disk gets assigned one of these drive letters, it can cause conflicts.
You can reassign drive letters in Windows to resolve letter mismatch errors. This can be done through File Explorer by right-clicking the drive and selecting “Change Drive Letter and Paths.” Letters can also be changed from the command line using the diskpart tool. Just type “diskpart” to launch it, then “list volume” to see volumes and “select volume X” followed by “assign letter=Y” to reassign the drive letter. See this guide for more details.
Reassigning the drive letter to an unused letter that does not conflict with a system disk letter may allow write access to be restored.
Resolving Registry Errors
One potential cause of the “disk is write-protected” error is incorrect registry settings. The Windows registry contains configuration settings that control various aspects of the operating system. An error in the registry could mistakenly flag a disk as write-protected.
You can edit the registry to remove write protection, but this should be done with caution. Editing the registry incorrectly could cause serious issues. Consider backing up the registry before making changes.
To edit the registry on Windows 10 or 8:
- Press Windows Key + R to open the Run dialog box.
- Type “regedit” and press Enter to open the Registry Editor.
- Navigate to HKEY_LOCAL_MACHINE\SYSTEM\CurrentControlSet\Control\StorageDevicePolicies.
- Look for a value named WriteProtect and make sure it is set to 0. If it does not exist, you may need to create it as a DWORD value.
- Close the Registry Editor and restart your computer for changes to take effect.
For more details, refer to this guide: https://www.lifewire.com/remove-write-protection-windows-10-8-7-4586905
Editing the registry should only be done by experienced users. Consider seeking professional help if you are unsure about this process.
Troubleshooting Step-by-Step
Here are some step-by-step instructions to diagnose and resolve “disk is write protected” errors on both Windows and Mac machines:
On Windows
1. Try removing the disk and reinserting it. The write-protection may fail to disengage properly when first inserted.1
2. In Disk Management, check if the disk shows as Read-only. If so, right-click and select Properties. Uncheck Read-only to enable writing.1
3. Use the DISKPART utility to remove write protection. Open Command Prompt as admin and enter:
DISKPART

SELECT DISK # (where # is the number of the write-protected disk)

ATTRIBUTES DISK CLEAR READONLY
4. If the disk has a physical write-protect switch, switch it to the off/disabled position.
5. Run CHKDSK to detect and repair disk errors that could be causing the issue.
On Mac
1. Open Disk Utility and select the write-protected disk.
2. Click Erase at the top and erase/format the disk. This will remove write protection.
3. If the disk has a physical lock switch, make sure it is flipped to the unlocked position.
4. Run First Aid to check and repair disk errors.
When to Seek Professional Help
If you have tried the troubleshooting steps listed above and are still getting the “disk is write protected” error, it may be time to seek help from a professional data recovery service. Here are some common cases where DIY fixes fail and you’ll need an expert:
Physical damage – If the hard drive has suffered physical trauma like being dropped, liquid spillage, overheating, etc. Trying to repair it yourself in these cases could make the damage worse. Data recovery pros have specialized tools and clean rooms to safely repair and recover data from physically damaged drives. As per Secure Data Recovery Services, professional recovery is best for physically damaged drives.
Severe logical corruption – Sometimes corruption in the file system or directory structures can be too extensive for DIY software tools to fix. A data recovery service like DriveSavers uses advanced techniques like disk imaging, data extraction, and manual recovery to retrieve data even from a severely corrupted drive.
Failed DIY attempts – If you have unsuccessfully tried using disk utilities, changing cables, system restore, etc. and the drive still shows as write-protected, it’s best to stop further DIY attempts and hand it over to the pros. Continuing to run tests and repairs could overwrite your data making it unrecoverable. Data recovery services like Ontrack and CBL have high success rates even with drives that have failed DIY fixes.
