During the boot process, the BIOS (Basic Input/Output System) initializes hardware components and loads the operating system. The BIOS settings screen allows you to configure boot options like setting the boot order of storage drives or selecting between Legacy BIOS and UEFI modes.
If boot options are missing from the BIOS, you will be unable to select a drive to boot from. This prevents the operating system from loading and can make the computer unusable.
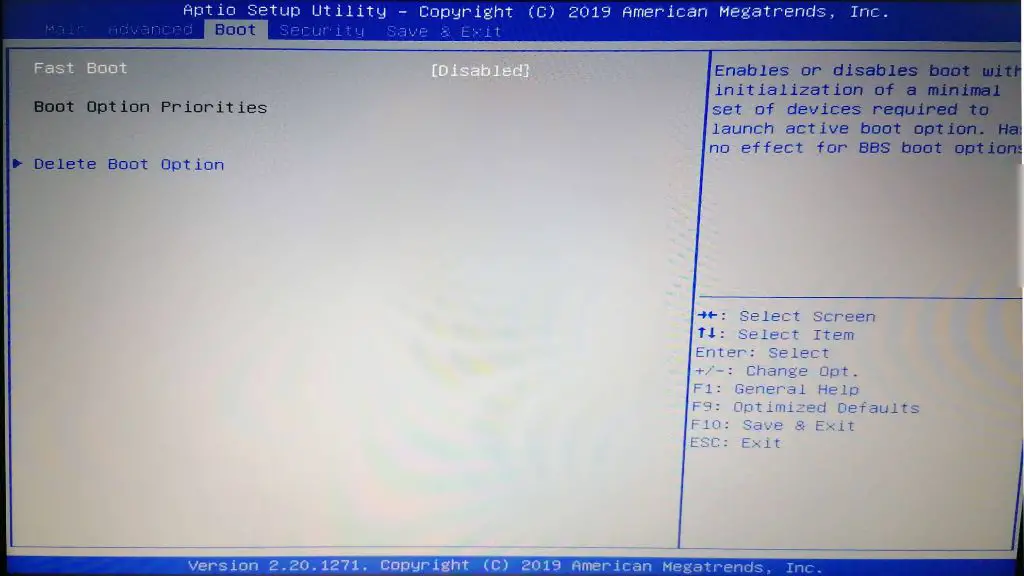
Check Boot Mode Settings
PCs can operate in either UEFI (Unified Extensible Firmware Interface) or legacy BIOS modes for booting the operating system. UEFI is a newer standard that replaces the old legacy BIOS firmware. There are some key differences:
UEFI offers more security features, faster startup times, support for larger hard drives, and better integration with modern operating systems like Windows 10 and 11. However, older operating systems like Windows 7 may only be compatible with legacy BIOS. Microsoft recommends using UEFI when possible.
To check which firmware mode your PC is using:
- Restart your computer and enter the BIOS setup utility, usually by pressing the Delete or F2 key.
- Look for a “Boot Mode” or similar setting – it may say UEFI or Legacy/CSM for legacy BIOS.
If the incorrect mode is enabled, you can switch modes here. Just be aware this may impact OS compatibility. After saving changes and exiting BIOS, you may need to reinstall your operating system clean for proper functionality.
Update BIOS
Updating your motherboard’s BIOS to the latest version is one of the best ways to resolve boot issues. An outdated BIOS may not properly support new CPUs, RAM, and other hardware that has been introduced since the board was first made. According to MakeUseOf, updating your BIOS allows you to “use hardware you couldn’t previously” and can fix bugs or other problems with older versions [1]. User discussion on Reddit also suggests BIOS updates can provide performance improvements, though some caution it may reduce performance in rare cases [2].
To update your BIOS, first find your motherboard model, then go to the manufacturer’s website and download the latest BIOS update available. Make sure your computer meets the minimum requirements for that BIOS version. Then follow the instructions to flash the BIOS—this usually involves extracting files to a FAT32 USB drive, rebooting to the BIOS menu, and selecting the flash option. Take care not to interrupt the flashing process. After a successful update, restart your PC and check if your boot options have been restored.
Reset BIOS to Default Settings
In some cases, incorrect or customized BIOS settings may hide boot options like the boot menu. Resetting the BIOS to its factory default settings can overwrite any changes made and restore the original boot options.
To reset the BIOS settings:
- Restart your computer and enter the BIOS setup utility, usually by pressing the Delete, F1, F2, F10 or F12 key during the boot process.
- Navigate to the “Exit” tab or menu.
- Select the option to “Load Optimized Defaults” or “Restore Defaults.” This resets all settings to their factory defaults.
- Select “Save & Exit” or “Exit Saving Changes” to save changes and restart.
Resetting to the factory settings will erase any custom configurations and restore the original boot order and options (per Dell and Easeus). This should make the boot menu accessible again if it was previously hidden.
Check Boot Drive Connections
Loose SATA/M.2 connections could prevent drives from being detected in the BIOS. Carefully check that all power and data cables are properly seated for all hard drives and SSDs. For desktop computers, open the case and verify the SATA and power connectors are firmly plugged into the motherboard and drives. For laptops, check that any removable SSDs or HDDs are fully inserted into their slots.
If using an M.2 NVMe SSD, ensure it is properly seated in the M.2 slot and has the retaining screw tightened. Wiggling the drive or reinserting it can help make better contact if the connection is loose. Also verify that both ends of SATA data cables are firmly inserted, as a loose connection at either the drive or motherboard can cause detection issues.
If the boot drive is an external portable hard drive or SSD, try using a different USB port and cable in case the connection is faulty. Reboot after reseating connections to allow the BIOS to detect attached drives.
For more information, refer to this guide on troubleshooting SATA connections: How to Fix ATA/SATA Hard Drive Not Detected in BIOS
Check Drive Boot Priority Order
Drives must be prioritized properly in BIOS boot order to show up in the boot menu. The boot priority order determines which device the system boots from first. If the boot drive containing the operating system is not at the top of the list, the system may attempt to boot from another device instead.
To change the boot order, enter the BIOS setup utility, usually by pressing a key like F2, F10 or Del during the initial boot process. Once in the BIOS, locate the “Boot” section and look for the boot priority order or boot sequence. This lists the drives in order from highest to lowest priority.
Make sure the drive containing your operating system, usually the hard drive or SSD, is listed first. If not, use the arrow keys to move it to the top of the order. Some systems may also have options for “Boot Menu” which displays a temporary one-time boot order select screen. After making changes, save and exit the BIOS to restart the PC.
Refer to your motherboard or PC manufacturer’s documentation for the exact steps to access and change the boot order for your specific system. For example, HP provides instructions in their support article “HP PCs – Configuring the boot order in the system BIOS” (https://support.hp.com/sk-en/document/ish_3891464-2337914-16).
Update Storage Drivers
Outdated storage drivers can prevent drives from being detected properly in the BIOS. This is because the BIOS relies on drivers to communicate with storage devices. If the drivers are outdated, they may not support initialization and detection of new drives and controllers.
To update your storage drivers, first identify your system’s chipset and SATA controller. For example, on many systems the chipset is made by Intel or AMD, while the SATA controller may be from makers like ASMedia or Marvell.
Once you know the chipset and SATA controller models, visit the manufacturer website and download the latest drivers. For more general drivers, you can also get SATA drivers directly from Microsoft (see this guide). Make sure to get 64-bit drivers for Windows 10/11.
After downloading the drivers, run the installer and restart your PC when prompted. This will update the storage drivers so your BIOS can properly communicate with drives.
Fix Corrupted Bootloader
A corrupted bootloader can prevent Windows from starting up properly. The bootloader is a small piece of code that loads the operating system when you turn on your computer. There are two main types of bootloaders in Windows – Master Boot Record (MBR) for legacy BIOS systems, and GUID Partition Table (GPT) for newer UEFI systems.
The most common causes of bootloader corruption are sudden power loss, incorrect shutdowns, hard drive errors, and malware infections. If the bootloader code gets damaged, Windows will fail to load with an error like “BOOTMGR is missing”.
To fix a corrupted bootloader in Windows 10 or 11, you can use the bootrec command line tool or the Startup Repair feature. Bootrec can rebuild the bootloader information in the MBR or GPT disk partition scheme. Startup Repair will automatically scan and replace corrupted boot files.
To use bootrec, boot into recovery mode or the Windows setup media, open the Command Prompt, and run the following commands:
- bootrec /fixmbr – Fixes the MBR bootloader
- bootrec /fixboot – Writes a new bootloader to the system partition
Startup Repair can be accessed in the Windows Recovery Environment. It will automatically detect and replace damaged boot files. This is the easier option compared to using bootrec manually.
Repairing the bootloader using these tools should resolve the startup issues caused by bootloader corruption, restoring access to Windows.
Clear CMOS to Reset BIOS
The CMOS battery on the motherboard stores the BIOS settings. Clearing the CMOS will reset your BIOS to factory default settings and can resolve issues like boot options not showing up.
Here are the steps to clear CMOS to reset the BIOS (source: https://www.lifewire.com/how-to-clear-cmos-2624545):
- Turn off your computer and unplug the power cable.
- Open up the PC case and locate the CMOS battery on the motherboard.
- Remove the CMOS battery from the motherboard for at least 15 minutes.
- Put the CMOS battery back in and close up the PC case.
- Plug the power cable back in and turn on your computer.
The CMOS has now been cleared and the BIOS reset to factory defaults. Go into BIOS setup to reconfigure any settings like boot order.
Conclusion
In summary, there are several potential reasons why the boot option may not show up in your computer’s BIOS. First, check the boot mode settings and make sure it is set to UEFI or Legacy/CSM as needed. Updating to the latest BIOS version can also help resolve compatibility issues with boot devices. If the boot option still does not appear, resetting BIOS to default settings may restore the boot menu.
Additionally, check that your boot drive is properly connected and detected in the BIOS. Go through the boot priority order and make sure the drive is prioritized. Updating storage drivers can fix driver conflicts that prevent booting as well. In rare cases, a corrupted bootloader or CMOS battery failure may require steps like fixing the bootloader, clearing CMOS or replacing the battery.
If you have tried all these troubleshooting tips and the boot option still does not show up, the computer may require professional repair. A technician can diagnose hardware faults, reflash the BIOS chip, or replace faulty components that could be preventing the boot option from displaying.
Persistence is key when dealing with boot issues. Start from the simple solutions and work your way to the complex ones. With patience and care, you should be able to resolve the missing boot option problem and get your computer booting properly again.
